The Golf Grip

By Kevin Cotter, PGA

The grip is the primary connector from the body to the club, and as the great Arnold Palmer once said, “The grip is the crucial junction point from which all the body’s strength and rhythm transferred to the club.”

There are three grip options from which to choose:

The most common grip is the overlapping or Vardon grip, named after Harry Vardon, where the little finger of the right hand (lower hand) is positioned over the top and between the left hand’s first two fingers. 

The second option is the interlocking grip, where the little finger of the right hand is intertwined with the index finger of the left hand. This adjoining or melding of the hands with both the Vardon and overlapping grip helps unify the hands and aids in preventing one hand from overpowering the other, resulting in increased distance and consistency. 

The third option, or the ten-finger grip, sometimes called a baseball grip, is only recommended for very young or physically weak individuals without adequate strength to hold and swing the club.

 
4 Steps to A Solid Grip
Brian Mogg, GOLF MAGAZINE Top 100 Teacher
  • Lower scores are just a click away! Go to www.BestGolfeBooks.com today! Your golf eBook Superstore!

    Also, please check this article out for a great overview on developing a fundamentally sound championship level golf grip!  Click Here


Releasing the Clubhead

This story is for you if…
• You want more distance and accuracy
• You often miss your target to the right
• You don’t understand what “release” means
  1. Erika Larkin

    Photo By J. D. Cuban/Golf Digest

    BY ERIKA LARKIN

    It’s no big mystery why you’re slicing your driver. The clubface is open to your swing path at impact. And that slice can get worse if you pull in your arms on the downswing to try to steer the ball into the fairway. Here’s my easy fix: Remember to roll and reach as you swing through. Let your forearms roll over to square the clubface and then reach your arms toward the target.

    You can get a feel for this full release by hitting some “bunt” shots with your driver. Tee up a ball and take your driver back until the shaft is parallel to the ground and the toe of the club points straight up (see photo). From there, focus on extending the shaft toward the target so it mirrors that halfway-back position, with the toe up again. Bunt some balls down the range, and don’t worry about distance.


     The Standard Advice

    Try to square the clubface at impact for straighter and more accurate shots.

    Why it’s Misleading

    Impact lasts only a few milliseconds, so trying to perfect that moment is nearly impossible.

    The Tip You Really Need

    A solid release guarantees proper clubface rotation through impact, so perfect it instead. Plus, it’s easier to control your release. As you drive through the hitting zone, give the ball a slap with your right hand, changing your right wrist from bent back to bowed. Check the positions at left to see what it looks like.

     Elbow In

    Your left elbow should hang tight against your torso as your hands release. You can’t unhinge your wrists if your left arm bows out (no chicken-winging).

     Shoulder Under

    Your right shoulder moves under your chin, not in front of it. This allows your hands to power the clubhead correctly through impact and then around your body.

     KEY MOVE – Active Wrists

    Prior to impact your right wrist was bent. Now it should be bowed. This doesn’t happen by itself—”slap” the ball with your right hand to release the club properly.

     Club on Line

    A proper release whips the clubhead around your body in a circular motion and into your finish.


My Favorite Shots To Save Par

See on Scoop.itgolf instruction

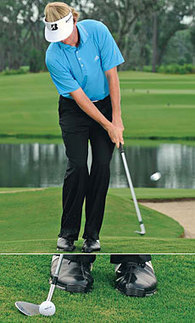
Brandt Snedeker shares his favorite shots around the green. (RT @GolfDigestMag: One of Brandt Snedeker’s favorite shots around the green? The hands-free lob.

BestGolfeBooks‘s insight:

The "Hands free lob" is an adaptation to the pitching swing and is a great tool in and around the green.  The firmness in the hands provides a high degree of consistency.

See on www.golfdigest.com

How to Start the Golf Swing

By Kevin Cotter, PGA

The takeaway or start of the golf swing begins with combined movement of the clubhead, hands, arms and shoulders.

This movement, commonly referred to as the “one-piece takeaway” is quickly followed by the hips as they begin to turn in response to the shoulders.  As the hips rotate the lower body (knees and feet) become active as the weight begins to transfer back onto and eventually around the right leg.

Soon after the “once piece takeaway” begins, allow your right elbow to fold somewhat against your right side, at least in the early stages of the backswing.  This allows the arms to remain connected to the body.

The “one piece takeaway” sets the timing of the swing into immediate sync.  The desired sequence of movement is; clubhead, hands, shoulders, hips and lower body in that order.   This backswing sequencing establishes proper coiling of the upper body against the lower body, providing a power generating spring like action to be unleashed during the downswing. Correct timing also helps establish a square clubface position at the top of the swing.

In addition to timing, the proper takeaway is crucial in developing power through angular momentum or also known as the “lever system.”  Proper use of the “lever system” not only unleashes tremedous power but helps establish a ball first then turf strike when playing shots directly off the turf.  Learning to strike the ball with a descending blow is vital, a downward strike to a ball sitting on the turf provides the much needed spin necessary for the ball to stick and hold in the intended target area.

Also, the path of the club is hugely influenced by the natural flow of the “one-piece takeaway.” When not contrived in any way the club moves straight back then slightly to the inside around then up. Eventually, the club returns somewhat along the same path on the way down, creating a semi-circle pattern starting from behind the ball through the ball and into the through swing.

If the club is forced quickly to the outside during the initial stages of the backswing an out to in swing path is likely to be created. Conversely, if you force the club back too quickly to the inside,  the club eventually has nowhere to go but to be forced to the outside and then back across the ball resulting in pulled or sliced shots.

So, as you can now clearly see, the “one piece takeaway” is the crucial first step in developing a powerful repeating golf swing, and provides the ability to consistently strike the ball cleanly and squarely,  leading to longer and straighter shots.

For the best golf training and instructional aids on the web please go tohttp://www.BestGolfeBooks.com your golf eBook superstore andhttp://www.EasytoLearnGolf.com blog for more great stuff to improve your game. Lower scores are just a click away!

Happy golfing!

Article Source: http://EzineArticles.com/?expert=Kevin_R._Cotter

PGA Golf Etiquette

By PGA.com staff

What people can expect during a round of golf, from beginning to end:

Arrive:

  • If caddies are available:
    • Remember caddie programs are an excellent way for young people to earn some money and be exposed to a sport that they can enjoy and might help shape their character.
    • A good caddie can make the round more enjoyable by giving you hints that might lower your score.
    • A good caddie can provide information on yardage, club selection, reading the greens and the layout of the course.
  • Warm Up:
    • Try to arrive soon enough to give yourself time to warm up properly.
    • Work your way though the bag, beginning with the short irons, moving onto the mid-and long irons and then the woods.
    • It’s often a good idea to finish warming up by hitting a few soft wedge shots before heading for the practice green and hitting a few putts.
    • Don’t hit hundreds of balls and leave your game on the practice tee.
  • First Tee:
    • Check the scorecard to learn any local rules.
    • Local rules apply only to the specific course you are playing.
    • If your playing companions suggest a match, it’s a good idea to make sure everyone is comfortable with the stakes.
    • Make sure to place an identifying mark on your ball and inform the other players the type and number ball you are playing.

Avoid Slow play:

  • When your group is not keeping up with the pace of play of the group in front of you:
    • Walk at a reasonable speed between shots.
    • Begin planning your next shot as you approach the ball by studying the strength and direction of the wind.
  • When you reach your ball, check the lie, select your club, visualize your swing and shot, and then play your shot.
  • From the time you select your club until you actually hit your shot, you should take no more than 30 to 45 seconds.
  • If you aren’t ready to play when it is your turn, encourage one of your fellow players to play.

Maintaining the course:

  • Replace your divots.
  • Turf tends to explode on impact, making it difficult, if not impossible, to replace the divot. In this case, you have two options:
    • You can use the toe of your shoe to kick in the turf around the edges of the divot.
    • Many courses often put containers of a soil/seed mixture on their carts and tees. If this is the case, simply fill in the divot with the mixture.
  • Bring a rake into the bunker with you — remembering that you should always enter the bunker from the low side at a point nearest to the ball.
    • Whenever possible, avoid walking on the steep face of a bunker.
    • After hitting your shot, rake the area you played from, as well as all your footprints and any others within reach.
    • Rakes should be left either in or nearby the bunker.
  • Important to repair any pitch marks or indentations caused by the ball hitting the green.
  • Using a tee, knife, key or repair tool, repair the mark by working the edges towards the center, without lifting the center of the mark. Don’t tear the grass. Finish by smoothing the area with a club or your foot. Try to get the area smooth enough to putt over.
  • Just remember that while the Rules of Golf allow you to repair pitch marks on your putting line, you cannot repair spike marks on your putting line until after you have putted.

On the green, remember:

  • Don’t step on your fellow players putting lines — the imaginary line that connects the ball to the hole.
  • If your ball is on a player’s line, volunteer to mark the ball.
  • If you’re ball is not furthest from the cup:
    • Mark your ball, either with a plastic marker or a small, thin, dark coin such as an old penny.
    • After you have marked your ball, place your putter down at a 90-degree angle with the heel touching your marker.
    • Move the marker from the heel to the toe of your putter. Reverse the procedure to return the ball to its original position.
  • Do not stand where you might distract a fellow player and don’t move.
  • Don’t make any noise when your fellow player is preparing to putt.
  • If you don’t have a caddie and are asked to tend the flagstick, make sure you aren’t standing on anyone’s line.
  • Hold the flagstick at arm’s length so the flag doesn’t flutter in the breeze, and make sure your shadow doesn’t fall across the hole or line. Loosen the bottom of the flagstick so it doesn’t stick when you try and remove it by pulling it straight up after the other player has putted. The flagstick should be removed right after the player has hit the ball.
  • If you lay down the flagstick, lay it off the green to prevent doing any damage to the green.
  • Generally, the player closest to the hole will tend the flagstick.
  • After everyone has putted out, immediately walk to the next tee.

Miscellaneous:

  • If you hit a tee shot into the woods and suspect that it might be either lost or out-of-bounds, the Rules of Golf allow you to play a second or provisional ball.
    • You then have five minutes from the time you reach the spot where you suspect the ball landed to find the ball. If it is not found within that five-minute period, you must declare it lost and play your provisional ball with a one-stroke penalty
    • If, however, you play the provisional ball and subsequently find your original ball in-bounds, you must pick up your provisional and continue to play the original ball, in-bounds.
    • Out of bounds balls are assessed the penalty of “stroke and distance.”
    • For a complete discussion of the Rules of Golf, visit the USGA’s web site.
  • For safety’s sake, never hit when there’s a chance you might be able to reach the group ahead of you, and anytime you hit a shot that you think even has remote chance of hitting any other players, yell “fore” immediately, and make a point of apologizing to any players your ball lands near.
  • Displays of frustration are one thing, but outbursts of temper are quite another. Yelling, screaming, throwing clubs or otherwise making a fool of yourself are unacceptable and, in some cases, dangerous to yourself and others.
  • As a player, you also have a responsibility to learn and understand the Rules of Golf.
  • Five of the most common Rules are those deal with Out of Bounds, Lost balls, Unplayable lies, cart paths and water hazards.
  • Moving on, if your group stops for refreshments, either at the turn (the end of nine holes) or following the round, volunteer to pay for them, as well as offer to buy drinks for the caddies.
  • Whoever pays at the turn, however, should not be expected to pay for refreshments at the end of the round.
  • Finally, at the end of the round, shake hands with your fellow players, congratulate the winners, console the losers, and thank them for their company. At the end of the day, the great pleasure of the game is the time you get to spend with your friends whether old friends or new friends you just made through the game.

For a complete discussion of the Rules of Golf, visit the

GOLF ETIQUETTE 101

GOLF ETIQUETTE 101

The Spirit Of The Game

Unlike many sports, golf is played, for the most part, without the supervision of a referee or umpire. The game relies on the integrity of the individual to show consideration for other players and to abide by the Rules. All players should conduct themselves in a disciplined manner, demonstrating courtesy and sportsmanship at all times, irrespective of how competitive they may be. This is the spirit of the game of golf.

Safety

Players should ensure that no one is standing close by or in a position to be hit by the club, the ball or any stones, pebbles, twigs or the like when they make a stroke or practice swing.

Players should not play until the players in front are out of range.

Players should always alert greenstaff nearby or ahead when they are about to make a stroke that might endanger them.

If a player plays a ball in a direction where there is a danger of hitting someone, he should immediately shout a warning. The traditional word of warning in such a situation is “fore.”

Consideration For Other Players

No Disturbance or Distraction

Players should always show consideration for other players on the course and should not disturb their play by moving, talking or making any unnecessary noise.

Players should ensure that any electronic device taken onto the course does not distract other players.

On the teeing ground, a player should not tee his ball until it is his turn to play.

Players should not stand close to or directly behind the ball, or directly behind the hole, when a player is about to play.
View Avoiding Distraction Animation

On the Putting Green

On the putting green, players should not stand on another player’s line of putt or when he is making a stroke, cast a shadow over his line of putt.

Players should remain on or close to the putting green until all other players in the group have holed out.
View Putting Green Animation

Scoring

In stroke play, a player who is acting as a marker should, if necessary, on the way to the next tee, check the score with the player concerned and record it.
View Scoring Etiquette Animation

Pace Of Play

Play at Good Pace and Keep Up

Players should play at a good pace. The Committee may establish pace of play guidelines that all players should follow.

It is a group’s responsibility to keep up with the group in front. If it loses a clear hole and it is delaying the group behind, it should invite the group behind to play through, irrespective of the number of players in that group.
View Playing At A Good Pace Animation

Be Ready to Play

Players should be ready to play as soon as it is their turn to play. When playing on or near the putting green, they should leave their bags or carts in such a position as will enable quick movement off the green and towards the next tee. When the play of a hole has been completed, players should immediately leave the putting green.
Viewing Being Ready To Play Animation

Lost Ball

If a player believes his ball may be lost outside a water hazard or is out of bounds, to save time, he should play a provisional ball.

Players searching for a ball should signal the players in the group behind them to play through as soon as it becomes apparent that the ball will not easily be found.

They should not search for five minutes before doing so. Having allowed the group behind to play through, they should not continue play until that group has passed and is out of range.
View Saving Time With A Lost Ball Animation

Priority On The Course

Unless otherwise determined by the Committee, priority on the course is determined by a group’s pace of play. Any group playing a whole round is entitled to pass a group playing a shorter round.
View Priority On The Course Animation

Care Of The Course

Bunkers

Before leaving a bunker, players should carefully fill up and smooth over all holes and footprints made by them and any nearby made by others. If a rake is within reasonable proximity of the bunker, the rake should be used for this purpose.
View Bunker Etiquette Animation

Repair of Divots, Ball-Marks and Damage by Shoes

Players should carefully repair any divot holes made by them and any damage to the putting green made by the impact of a ball (whether or not made by the player himself). On completion of the hole by all players in the group, damage to the putting green caused by golf shoes should be repaired.
View Divot Repair Etiquette Animation

Preventing Unnecessary Damage

Players should avoid causing damage to the course by removing divots when taking practice swings or by hitting the head of a club into the ground, whether in anger or for any other reason.

Players should ensure that no damage is done to the putting green when putting down bags or the flagstick.

In order to avoid damaging the hole, players and caddies should not stand too close to the hole and should take care during the handling of the flagstick and the removal of a ball from the hole. The head of a club should not be used to remove a ball from the hole.

Players should not lean on their clubs when on the putting green, particularly when removing the ball from the hole.

The flagstick should be properly replaced in the hole before players leave the putting green.

Local notices regulating the movement of golf carts should be strictly observed.

Conclusion; Penalties For Breach

If players follow the guidelines in this Section, it will make the game more enjoyable for everyone.

If a player consistently disregards these guidelines during a round or over a period of time to the detriment of others, it is recommended that the Committee consider taking appropriate disciplinary action against the offending player. Such action may, for example, include prohibiting play for a limited time on the course or in a certain number of competitions. This is considered to be justifiable in terms of protecting the interest of the majority of golfers who wish to play in accordance with these guidelines.

In the case of a serious breach of Etiquette, the Committee may disqualify a player under Rule 33-7.
 

Top Three Golf Swing Set-Up Tips

Stance

The stance is the foundation of the golf swing and like many other sports requires the player to prepare for athletic action. Begin by evenly dividing your weight between both feet, slightly favoring the balls of the feet not the toes or heels. Next, position the feet approximately shoulder width apart. Proper stance width helps maintain good balance, too narrow a stance increases instability and too wide restricts hip and shoulder turn, making it difficult for the player to properly transfer weight back onto and over the right leg during the backswing.

Turn the left foot (forward foot) outward toward the target about a quarter turn. This position allows the player to maintain dynamic balance throughout the golf swing and well into the finish. The back foot (right foot) should generally be pointed straight forward or at a right angle to the target line. This position allows power-generating resistance to build by stabilizing the right leg while the upper body turns around it.

Alignment/Aim

Aligning or aiming the body properly is crucial if one desires to develop a powerful repeating golf swing. The first key point of alignment is; align the leading edge of the
clubface square or at a right angle to the target line. Then set the tips of the toes, knees, hips, shoulders and eyes parallel to that same line. This method of alignment is
referred to as aiming “parallel left.” If a player is to err or deviate from this common principle it would typically involve the feet and body aiming slightly to the left of the
target. Keep in mind though, whatever combination of body and clubface positions a player employs is deemed acceptable if it results in the clubhead consistently traveling down the target line with the clubface square to that line.

Golf is a target game and it is very easy to get caught up in the complexity of the perfect golf swing. However, many who follow this quest fail to recognize that no matter how beautiful the swing becomes it is of little value if aimed incorrectly

Posture

Another key element to develop a powerful repeating golf swing requires the upper body to be tilted over the ball slightly at address. This is achieved by bending from the hips over the ball, not the waist. Bending from the hips allows the spine to remain straight and the buttocks to protrude slightly, whereas if we tilt from the waist the spine tends to curve. The head should also match the plane of the back; this allows the left shoulder to turn underneath the chin during the backswing. This very much helps maintain centeredness while completing the backswing.

Article Source: http://EzineArticles.com/?expert=Kevin_R._Cotter

Article Source: http://EzineArticles.com/7100068

History of Golf


History of Golf

By Kevin Cotter, PGA

How and where the history of golf originated is for the most part unknown and continues to be the subject of much debate. Although, for the most part it is widely understood that the Scots during the middle ages where largely responsible for creating the game of golf we play today, a claim that has undergone substantial scrutiny and numerous challenges over many centuries.

There are several forerunners to the history of golf dating back as far as early 1297 to the Netherlands, leaving the Dutch to appear to have the closest ties to the origin of golf. Further evidence is supported by early 13th Century Dutch literature which contained numerous references to “golf like” games with medieval names such as “spel mitten colve” (play with club). Additionally, Dutch master painters of the day created numerous paintings and sketches of early participants playing a game with a club and ball in Holland, most certainly resembling what we know today as golf.

Commerce between Scotland and Holland blossomed throughout the North Sea trade route during the beginning of the middle ages. Sailors and traders often became stranded or delayed due to bad weather and became perfect candidates to become introduced to a new and better way to enjoy their leisure time and began to participate in the favorite local sports of the day. In many instances, some of the players shown in Dutch pictures wore kilts giving a clear indication they were Scottish visitors.

The first written word of golf in Scotland was referenced back to 1457, which at the time declared golf as illegal. In Holland the earliest written record dates back to 1297 and describes a cross-country version of a game with four players to a side, playing four holes with the objective being to strike the doors of pre-selected buildings with the ball along the way, the equivalent today of “holing out.” The prize for the winning side was often a barrel of beer, giving a clear indication that celebrating at the “19th hole” is a long-standing time-honored tradition.

The history of golf also shows Scottish and Dutch people jointly attending many festivals, fairs and large market gatherings, where among the countless items sold were leather-covered balls stuffed with feathers or cow hair. The only other early style golf ball we know of was made of wood. Interestingly, during the middle 1600’s the Scottish king appointed a “golf ball maker” in an effort to better balance the trade deficit because the feathery golf ball was quite expensive.

One might assume from this information that a reasonably strong case could be made for Holland being tagged “the true founder of golf.” But looking beyond the Dutch border, historical records tend to indicate that Belgians played a similar stick and ball game called “chole,” which was derived from Italy. But, these were one-club contests, with some of those clubs being used to perform more than one type of shot. Modern day golf as we know it today is played with a variety of clubs, up to fourteen according to the official USGA Rules of Golf and the Royal and Ancient Golf Club of St. Andrews.

Also, the game today is played over a large area frequently exceeding 100 acres using a small ball with the primary object being to stroke the ball into the hole in the fewest strokes possible from a designated starting area (teeing ground) which for the most part was developed by the Scots and propagated by them around the world. Clearly, they deserve much of the credit for the game of golf as we know it today.

If you want to learn more about the wonderful game of golf and learn how to play please visit http://www.KRCotter.com

Article Source: http://EzineArticles.com/?expert=Kevin_R._Cotter

Four Keys to Developing a Championship Golf Grip

Developing a championship golf grip is essential to consistently deliver the clubface squarely to the ball. As the great Arnold Palmer once said “The grip is the crucial junction point from which all the body’s strength and rhythm are transmitted to the club.”

The golf grip is considered a pre-swing principle and carries with it a wide range of personal preferences from which to choose, but there are four keys or common denominators to a championship golf grip that all great players apply.

1. Positioning

“Positioning” refers to the rotational location of the hands on the club. The proper position is best achieved by first allowing your arms to hang somewhat naturally while grasping the club, resulting in a position where the palms of each hand oppose one another or are rotated slightly inward. This resembles the look of praying upside-down. If the hands shift too far to the right or clockwise on the club it would be considered a “strong grip” (closed-face-grip) which encourages a hook, if rotated to far to the left or counterclockwise the opposite would apply or “weak grip” (open-face-grip) which encourages a slice. A desirable position would be one where the upside down V formed between the thumb and forefinger of the left hand (upper hand) points to your chin or right cheek, and the V formed by the lower hand pointing slightly more towards the right shoulder. The opposite would apply for the left-handed player

2. Placement

The upper hand should be placed consistently about 1/2 to 1 inch down the grip from the top or upper end of the club. Position the thumb of the left hand slightly right of center on top of the club; place the thumb of the lower hand on the forward side of the club touching both the club and the tip of the index finger. Also, grip the club in the fingers of both hands as much as possible as grasping the club into the palm rather than the fingers tends to limit joint wrist flexibility.

3. Grip Pressure

Grip pressure should be a 2 or 3 on a scale from 1-5 with 5 being the tightest you could possibly hold the club, or light enough to encourage maximum clubhead speed without losing directional control, and still hold onto the club. Gripping the club too tightly retards clubface rotation as well as prevents the hands/wrists from hinging properly, destroying power generating leverage.

4. Grip Options

There are three grip options from which to choose. The most common grip is the overlapping grip or Vardon grip named after Harry Vardon, where the little finger of the right hand (lower hand) is overtop and in-between the first two fingers of the left hand. The second option is the interlocking grip where he little finger of the right hand is intertwined with the index finger of the left hand. This adjoining or melding together of the hands with both the Vardon and overlapping grip help unify the hands and aids in preventing one hand overpowering the other resulting in increased distance and consistency. The third option or the ten-finger grip sometimes called a baseball grip is only recommended for very young or physically weak individuals who do not possess adequate strength to otherwise hold and swing the club.

Lowering your scores is just a click away! The best instruction available is at your fingertips! Go to http://www.KRCotter.com and begin to achieve your potential now! Impress your friends and begin to eliminate those embarrassing shots today!

Article Source: http://EzineArticles.com/7085976